Receipt Print Settings
Allows user to select the desired receipt design/template and also customize it
according to their requirements.
Follow the following steps to customize your sale receipt:
- Go to Home tab and click on Receipt Print Settings.
- Select the desired sale receipt template from the variety provided and press Select button to make it the default template.
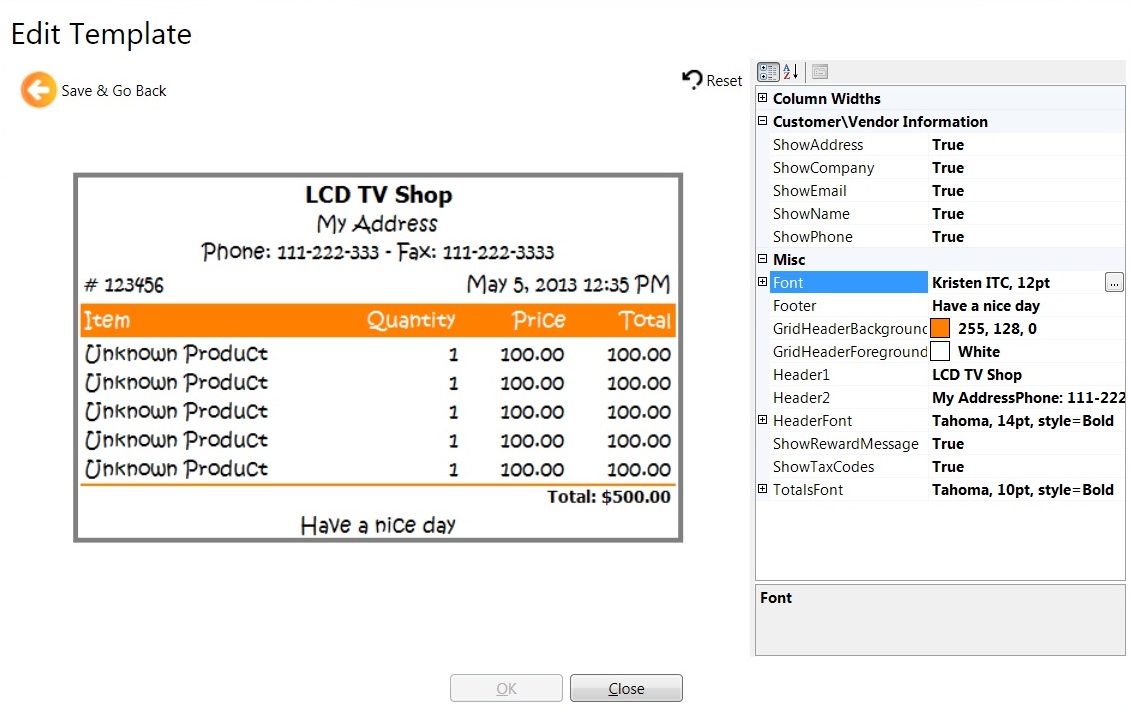
- Press Edit button to customize it.
- Users can easily customize the selected template in this window. Users can change
the width of columns. Users can also change the size, font, color and style etc.
of "Header", "footer" messages and "Totals" to suite their requirement.
- Press Go Back button to go to the previous screen.
- Select your printer from the combo box. You can select a receipt printer or a regular
printer which prints on A4 paper.
- Select your new template and press the Print button to get the print preview of
a test print. Press Print button on the toolbar of preview window to get a test
print.
- Click Margins & Page Settings to adjust your page margins.
- Press OK to save your settings.